Issue: Asterisk configuration for call parking and conference rooms.
Quick: features.conf file and meetme.conf file
Visual/Learning:
Lesson learned here was that if you do not have zaptel ztdummy configured correctly then conference rooms are not going to work.
Call Parking - Allows you to send a call to a holding area and then pick that call up from another phone. We use this feature a lot in our company. We sometimes park calls when an urgent call comes in and the person is not at their desk. We just park the call and page the person using our intercom system. They can then take the call from the nearest available phone.
Setup for this feature happens in the features.conf file.
[general] section
parkext => 700 (This is the number where you transfer the call to park it, the system tell you what position the call is in)
parkpos => 701-720 (this provides 20 parking positions 701 to 722)
context => parkedcalls (sets the context for parked calls)
parkingtime => 45 (Set seconds to park, if the call is not picked up before the time limit it is transferred back to the extension that sent the call to parking)
In my extensions.conf file I need to include the parkedcalls context
[internal]
include => parkedcalls
To get this to work you need to restart Asterisk. A simple reload will not get the changes in the features.conf file.
After restarting Asterisk this is how it works.
You get a call and answer it.
Now I use the 'more' softkey to get to the 'trnsfer' softkey and press it.
I dial 700 and I hear the system speaks the numbers 7 0 1 and I press the 'trnsfer' softkey again.
Now using any phone I can dial 701 and I am connected back to the caller.
MeetMe Conferencing
Allows callers to conference by calling a meeting conference number. Conference calls can be protected by passwords as well.
edit meetme.conf
[rooms]
conf => 350,54321
Save this file
350 is the conference room extension, and 54321 is the password for the conference room. You can leave this off if you want like this:
conf => 350
Edit the extensions.conf file.
Under our internal context:
[internal]
exten => 350,1,MeetMe(350)
You can add so function by adding some line before connecting to the conference call. I learned the hard way not to add these lines after connecting the conference all. It did not work and I got an error message in the console that:
" No Zap channel available for conference, user introduction disabled"
So please put the call to the MeetMe conference room last.
exten => 350,1,Playback(conf-thereare)
exten => 350,n,MeetMeCount(350)
exten => 350,n,Playback(conf-peopleinconf)
exten => 350,n,MeetMe(350)
Line one plays a message that "There are currently..."
Line two plays the number of people in the conference call
Line three plays a message "...people in this conference"
Line for connects the call to the conference.
So the first caller dials 35o and hears:
"There are currently zero people in this conference"
The next person to call will here that there is one person, and so on.
Next time connecting to our intercom system.
Asterisk PBX System Install - 11 Overhead Paging
Asterisk PBX Install - Index
Wednesday, May 27, 2009
XP - Troubleshoot Boot Problems
Issue: Need a good one stop diagnostic tool for fixing boot problems.
Quick: MSCONFIG
Visual/Learning:
The link below has a lot of good information about this tool.
TechRepulic Link
------ Overview of Info from Link -------------
Start - Run - msconfig to start the tool.
GENERAL TAB
- Diagnostic Startup (Loads only what it needs to run Windows)
- Selective Startup (Deselect startup items to isolate problem)
- Launch System Restore (To go back to restore point)
- Expand file (get a new copy of windows file from cab files)
SYSTEMS.INI AND WIN.INI TABS
Enable and disable sections of code using a check box.
Rearange code sections with 'Move Up' and 'Move Down'
BOOT.INI TAB
Can select boot modes (Safe Mode, Safe Mode with Networking, AlternateShell for cmd prompt)
-Noguiboot (no VGA video driver for boot display)
-Bootlog (enable boot logging)
-Basevideo (forces standard VGA driver)
-Sos (shows driver names as they are loaded)
-Advanced Options Button
--Maxmem (limit memory XP can use to check for bad memory module)
--Numproc (limit number of processors)
--Pcilock (stop XP form assigning sys resources to PCI devices)
--Debug (debugging mode)
---Debugport (port for debuging)
---Baudrate (baud rate for debuging)
---Channel (1394 channel for debug)
SERVICES TAB
-Enable and disable services with check box
-Hide all Windows services with check box (So you just see software added services)
STARTUP TAB
- Prevent items in startup folder from starting with a check box.
------ End Overview of Info from Link -------------
Friday, May 8, 2009
Opening Outlook 2003 Forms In OFT Files
Issue: Revert back to old behavior to allow .oft files to open.
Quick: Make changes to the registry
Visual/Learning:
In the old days you could open outlook forms as .oft files from Outlook without installing them. Due to security issues Microsoft changed the behavior so that you now have to install the form before you can open it. There are times that it may be helpful to revert back to the old behavior. For one thing it can save a lot of mouse clicks if you work with oft files a lot.
Here is a link on how to revert Outlook 2003 to old behavior.
TEXT FROM LINK
Not recommended: Re-enable the ability to create properties
Three registry keys can be deployed to client computers to disable the blocking of custom properties and revert Outlook to its previous behavior. These registry keys are supported by group policies. The following registry keys can revert Outlook 2003 to its previous behavior:
Note The following registry keys do not revert Outlook 2007 to its previous behavior.
AllowTNEFtoCreateProps (HKEY_CURRENT_USER\Software\Microsoft\Office\11.0\Outlook\Options\Mail] "AllowTNEFtoCreateProps"=dword:00000000): If the value is 0, TNEF/MIME cannot create new non-Outlook custom properties. This value is the default value. If the value is 1, TNEF/MIME can create new non-Outlook custom properties.
AllowMSGFilestoCreateProps: If the value is 0, .msg files and .oft files cannot create new non-Outlook custom properties. This value is the default value. If the value is 1, .msg files and .oft files can create new non-Outlook custom properties.
DisallowTNEFPreservation: To ease migration to this new behavior, Outlook preserves the original TNEF when custom properties are not created. The original TNEF is saved in a binary stream on the item that is saved. Outlook uses the following property tag to save the stream:
PR_TNEF_UNPROCESSED_PROPS PROG_TAG(PT_BINARY, 0x0e9C).
The HKEY_CURRENT_USER\Software\Microsoft\Office\11.0\Outlook\Options\Mail] "DisallowTNEFPreservation "=dword:00000000 registry setting controls whether Outlook creates the PR_TNEF_UNPROCESSED_PROPS property.
Note The PR_TNEF_UNPROCESSED_PROPS property is removed from a message when you embed a message into another message as an attachment. The PR_TNEF_UNPROCESSED_PROPS property is also removed when you forward a message or reply to a message.
END TEXT FROM LINK
Copy this text (between dashed lines) to a file called OFT.reg
------------------------------------------
Windows Registry Editor Version 5.00
[HKEY_CURRENT_USER\Software\Microsoft\Office\11.0\Outlook\Options\Mail]
"AllowTNEFtoCreateProps"=dword:00000001
"AllowMSGFilestoCreateProps"=dword:00000001
"DisallowTNEFPreservation"=dword:00000000
----------------------------------------
Save it and then double click on it to upload the registry changes.
Asterisk PBX System Install - 09 Voicemail Macros
Issue:
Configuring Voicemail in Asterisk
Quick/Visual/Learning:
Voicemail is an important part of any phone system and it seems to work amazingly well in Asterisk with very little configuration.
First you need to define the mailboxes in the voicemail.conf file.
The sample configuration file has a lot of stuff in it but want we need to configure is towards the bottom of the file.
In the sample file there is an example under the context of [default] that looks like:
[default]
1234 => 4242,Example Mailbox,root@localhost
The 1234 part is the extension of the phone
4242 is the password (this can be updated by the user from his phone)
“Example Mailbox” is the name of the mailbox owner and is used in dial by name directory lookups (see page 156 of the book)
root@localhost is the email address where you want to send a copy of any voicemail messages.
Note for more information about sending to a pager etc. look at the book on page 155.
For my use I need to add voicemail for myself. I will do this under the context of [default] and not [internal] (I orignally thought that my voicemail context should match my phone extension context but not true apparently.) I discovered, if I changed the context here, the message waiting light on my phone did not work. (I think the fix for that is to change the mailbox=207 in the sip.conf file to mailbox=207@internal, more on that below)
I add the following line to the voicemail.conf file.
207 => 1234,Jimmy Ezell,jezell@company.com
Pretty simple.
For each additional mailbox I just need to add another line under the [default] context.
Note - The ability to forward voice mail messages to a email account is great but if you need to look for a voicemail message they are stored in: /var/spool/asterisk/voicemail/ContextName/Extension/INBOX
Now we need to make some changes to the extension.conf dialplan file to make use of the voicemail.
To do this we use the voicemail() application like this:
Voicemail(207@default,u)
This will send callers to my voicemail and play the unavailable message. That is what the u means. But what if I want to play the busy message? Use a b instead of the u.
What I really want is for Asterisk to play correct message depending on if I am busy (on the phone) or unavailable (away from my desk). That requires a little programming and that is what we are going to look at now.
First I will show you what gets added and then explain it. Then we will look at a way of creating a macro so that we do not have to type this for each one of our phone extensions.
[internal]
exten => 207,1,Dial(SIP/207,10)
exten => 207,n,GotoIf($["${DIALSTATUS}" = "BUSY"]?busy:unavail)
exten => 207,n(unavail),Voicemail(207@default,u)
exten => 207,n,Hangup()
exten => 207,n(busy),Voicemail(207@default,b)
exten => 207,n,Hangup()
The first part you should know. There is the context of [internal] and the command to dial the phone.
You need to know that if Asterisk fails to connect to my phone it saves the reason in a variable called DIALSTATUS. This happens automatically.
Now if the phone does not pickup we go to the next line with the GotoIf command. The GotoIf command is going to allow us to control what happens next.
GotoIf(Expression?TrueDestination,FalseDestination)
Expression is going to be a comparison test follow by a question mark.
TrueDestinaiton and FalseDestination is going to be a lable that points to another line of the dialplan.
Expressions look like this $[expression], where the expression might be comparing two things like, is DIALSTATUS equal to BUSY? Or something like:
$[DIALSTATUS = “BUSY”]. The BUSY in quotes is what I am checking for.
This expression is not quite right yet. Remember that DIALSTATUS is a variable and we have to write it like this to get the contents of a variable - ${DIALSTATUS}.
So now after replacing DIALSTATUS with $[DIALSTATUS]we have:
$[${DIALSTATUS} = “BUSY”]
This is the expression that will compare the contents of the variable DIALSTATUS with the value of BUSY.
Here is the whole of line 2 for you to look at again.
exten => 207,n,GotoIf($["${DIALSTATUS}" = "BUSY"]?busy:unavail)
If DIALSTATUS is equal to BUSY we are going to go to the TrueDestination (busy) but is it is not equal to BUSY we are going to go to the FalseDestination (unavail).
You can see that (busy) is on the 5th line of our exten 207 dialplan.
exten => 207,n(busy),Voicemail(207@default,b)
So if line 2 is true we jump down to line 5 and we call the Voicemail application and request the busy greeting message.
On the other hand if line 2 is false we jump down to line 3.
exten => 207,n(unavail),Voicemail(207@default,u)
This is where you see the label (unavail) and call the Voicemail application and request the unavailable message.
Great so now Asterisk is able to decide which Voicemail message to play based on whether or not we are on the phone. That is great but I don’t want to have to type all those lines for each extension. That is where macros come in.
Macros are special contexts sections of the extensions.conf file. You start a macro context with the word macro followed by a dash (-) and the name of the macro. So our voicemail macro might start like this:
[macro-voicemail]
The s extension is the only one you can have in the a macro section.
To call a macro you use the Macro() application like this:
[internal]
exten => 207,1,Macro(voicemail,207)
So I replaced 6 lines with one single line that is calling my Macro named “voicemail” and passing it a variable which is my phone extension number “207”.
The Macro will look almost the same as the 6 lines I replaced.
[macro-voicemail]
exten => s,1,Dial(SIP/${ARG1},10)
exten => s,n,GotoIf($["${DIALSTATUS}" = "BUSY"]?busy:unavail)
exten => s,n(unavail),VoiceMail(${MACRO_EXTEN}@default,u)
exten => s,n,Hangup()
exten => s,n(busy),VoiceMail(${MACRO_EXTEN}@default,b)
exten => s,n,Hangup()
Here:
exten=>207 was replaced with the exten=>s (only s is allowed in a macro)
SIP/207 was replaced with SIP/${ARG1}, (ARG1 is the extension number passed to the macro)
207@default was replaced with ${MACRO_EXTEN}@default (Extension the macro was called from)
ARG1 and MACRO_EXTEN hold the same data so I really don't need both, but you can see that there are two ways to get the extension. One way is to pass it into the macro or else use the MACRO_EXTEN. MACRO_EXTEN is automatically loaded by Asterisk with the value of the extension that called the macro.
So with this macro I only need to add one line to the extensions.conf file. So I might add 3 phones under context [internal] like this:
exten => 207,1,Macro(voicemail,207)
exten=> 208,1,Macro(voicemail,208)
exten=> 209,1,Macro(voicemail,209)
To get the messsage waiting light to work you need to add a line to the sip.conf file.
Mailbox=207
If I had used a different voicmail.conf context, other then default, I would have to specify the context like:
mailbox=207@WhatEverTheContextName
Now we need to go to the asterisk console and run the command:
> reload (that will load the voicemail.conf changes as well as the other changes we made)
Should be able to call the extension and leave a voicemail message now.
Back in post 5 we configured the cisco sip dialplan to dial 500. We also configured the SIPDefault.cnf file to assign this number to the message button on the cisco phones.
This is what I am going to setup as now as the number to check voicemail.
In the extensions.conf file:
exten => 500,1,VoiceMailMain(${CALLERID(num)}@default)
500 will now dial voicemail. The CALLERID(num) will match the number I am calling from so that I do not manually have to enter the mailbox number. I will just be prompted for the password.
Next time call parking and MeetMe conference Calls
Asterisk PBX System Install - 10 Conference And Parked Calls
Asterisk PBX Install - Index
Tuesday, May 5, 2009
Outlook Forms 16 - Update Existing Forms
Issue:
You want to modify existing Outlook forms to use an updated or different form.
Quick/Visual/Learning:
At times I have had a need to update old Outlook forms to a newer one. I once had a helpdesk form that got changed along the way. The updated form was being stored in the same public folder as the old helpdesk form. The problem was that the people who refered to the data wanted the old forms to have the same look as the new forms. The form message class controls this and is stored in each item, so each item needed to be updated to use the new form instead of the old one. The solution at the time was to write a script that would update the form message class for each message.
I may still have the script I used somewhere but I saw this one and it is much nicer then my old one. I will put the link to it here: Helen Feddema's VB Script method followed by instructions on how to use it below.
Download the file code28.zip and extract the zipped files.
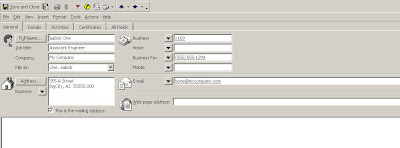
For this example I am going to change a contact form. Here is the standard one:
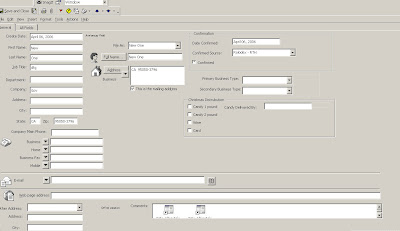
Here is the updated one with some extra fields for christmas gift list and so on:
Of the downloaded files in the zip, the file that really matters is "Reset Message Class.oft". You can install this in your personal forms library if you want or you can open it in design mode and run it from there. Either way should w0rk.
Next you need to know the names of the old and new message classes. You probably already know this but if you don't you can get it by changing the folder view.
Current View
Go to view/ Arrange By / Current View / Phone List
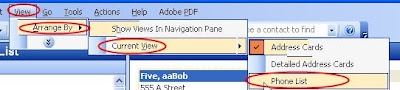
With the list view up Right Click in the list headings area and a menu will appear. Select Field Chooser
You want to modify existing Outlook forms to use an updated or different form.
Quick/Visual/Learning:
At times I have had a need to update old Outlook forms to a newer one. I once had a helpdesk form that got changed along the way. The updated form was being stored in the same public folder as the old helpdesk form. The problem was that the people who refered to the data wanted the old forms to have the same look as the new forms. The form message class controls this and is stored in each item, so each item needed to be updated to use the new form instead of the old one. The solution at the time was to write a script that would update the form message class for each message.
I may still have the script I used somewhere but I saw this one and it is much nicer then my old one. I will put the link to it here: Helen Feddema's VB Script method followed by instructions on how to use it below.
Download the file code28.zip and extract the zipped files.
For this example I am going to change a contact form. Here is the standard one:
Here is the updated one with some extra fields for christmas gift list and so on:
Of the downloaded files in the zip, the file that really matters is "Reset Message Class.oft". You can install this in your personal forms library if you want or you can open it in design mode and run it from there. Either way should w0rk.
Next you need to know the names of the old and new message classes. You probably already know this but if you don't you can get it by changing the folder view.
Current View
Go to view/ Arrange By / Current View / Phone List
With the list view up Right Click in the list headings area and a menu will appear. Select Field Chooser

In the Field Chooser Box Select "All Contact Fields" in the drop down.
Select Message Class from the list
Drag the Message Class field to the headings bar.
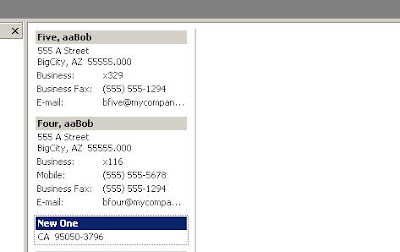
Now you can see the names of the message classes in the list view.
Now it is time to run the "Reset Message Class.oft" form .
Click the Select Folder button and Select the folder that has the forms you want to change.
Click the Change button and enter the old and new Message Class Names.
Click on Proceed.
It may take a couple of minutes depending on the number of records you have to update so be patient. When done you should see indication of how many items were processed and an OK Button.
Back on the list view of our contacts folder you will see that the Message class has been changed on all of our existing forms.
Go to Outlook Forms Index
Sunday, May 3, 2009
Windows Command Line History - Doskey
Issue: You have typed a lot of command at the command / dos prompt and want to run one of them again without retyping it.
Quick:
F7 - history list
Alt+F7 - Clear History
[characters]F8 - searches for command beginning with the characters you typed
Visual/Learning:
Doskey is the program in Windows that maintains history of dos commands. You can scroll through the list with the up and down arrow key, but you can also get a list of commands by pressing the F7 key.

You can clear the history with ALT-F7 or search for a command that starts with dir by typing dir followed by the F8 key.
Here is a link that has some good information about DosKey.
Friday, May 1, 2009
Asterisk PBX System Install - 08 Outbound Calls
Issue: Last time we got inbound calls working and it is time to enable outbound calls.
Quick/Visual/Learning:
In our last post we already configured the Cisco 1760 router outbound calls. It was the section of the configuration that looked like:
dial-peer voice 100 pots destination-pattern .T port 0/0 forward-digits all
Where .T is a wildcard that matches all numbers, so Cisco should pass along whatever numbers we send it to our external phone line. Now we just need to tell Asterisk what to send it.
For this I am working again off of Chapter 5 of the book, which is “Dialplan Basics” to learn about pattern matching and variables.
Because we do not know what external number is going to be dialed, we have to get Asterisk to recognize a pattern of numbers that will signal that this is an outside call. We also have to capture what number was dialed and pass that along to the Cisco switch, which is stored in a variable.
Variables are just buckets that hold a piece of information, such as a name or a number. Among other things variables simplify changes. For example if you need to change a sip device and you have called it in several locations of a dialplan then you have to change it in each location. For starters I am going to create a global (seen by the whole dialplan) variable that points to my outbound sip device. The [globals] context is a special context name were you can put these types of variables. Also note that variables are case sensitive.
[globals]
OUTBOUNDTRUNK=SIP/Cisco1760
This sets the contents of our OUTBOUNDTRUNK bucket (variable) to be the name of the Cisco router that I configured in the sip.conf file last time.
To get the contents out of a variable you have to write it like this ${VaribleName}. So per our example, we can use ${OUTBOUNDTRUNK} anywhere in our dialplan where we would normally put the text SIP/Cisco1760.
Now I will look at pattern matching. A typical way of calling an outside number is to dial 9 to get an outside line and then to dial the 7-digit local phone number. I would like Asterisk to match any number that starts with 9 and is followed by 7 digits, like 9XXXXXXX.
To do this you start your pattern with an underscore, and enter your pattern. X matches any number, Z matches 1-9, and N matches 2-9.
So to match a local number the pattern would look like:
_9NXXXXXX
After the 9 we are just going to match numbers 2-9 as a 1 after then 9 would be the pattern for a long-distance call.
One last bit is that we need to pass the number that was dialed to the Cisco 1760 so that the call can be processed. Asterisk has a built in variable that stores this information for us which is ${EXTEN}. We want to pass alone the phone number but not the leading 9, so to strip that off we use ${EXTEN:1}. The 1 says to start with the second number that was dialed. This is position one of the variable. That is a bit confusing but the positions of the variable start with zero like this: 012345678 so position 0 would be the leading 9 and position 1 is the first digit of our local phone number.
Now we should have enough information to update our dialplan.
[outbound-local]
exten => _9NXXXXXX,1,Dial(${OUTBOUNDTRUNK}/${EXTEN:1})
exten => _9NXXXXXX,n,Congestion()
exten => _9NXXXXXX,n,Hangup()
exten => 911,1,Dial(${OUTBOUNDTRUNK}/911)
exten => 9911,1,Dial(${OUTBOUNDTRUNK}/911)
Here we are going to match any local phone number and dial out using our outbound device (Cisco 1760). If this fails for some reason the next step is Congestion(), which play a fast busy tone, and the last step is to hang up the line.
Also we have the options for dialing 911 configured. This is set to work with or without dialing 9 first for an outside line (someone in an emergency might for get to dial 9 first).
Remember that ignorepat is this section of the book does not work with our Cisco phones and you have to use the DIALTEMPLATE file to keep dial tone after pressing 9 (see Asterisk PBX System Install - 05 Cisco SIP Phone)
Our outbound dialing has it’s own context [outbound-local]. Remember contexts are separate from each other. We want our internal users to be able to use this [outbound-loca] context so we need to include it in our [internal] context.
[internal]
include => outbound-local
Time to reload the dialplan.
#asterisk –r
>dialplan reload
Now with these changes we should be able to make an outbound call.
You can also add long distance and 800 number dialing by adding a context like:
[outbound-long-distance]
exten => _91NXXNXXXXXX,1,Dial(${OUTBOUNDTRUNK}/${EXTEN:1})
exten => _91NXXNXXXXXX,n,Congestion()
exten => _91NXXNXXXXXX,n,Hangup()
Remember to include it in the internal context as well.
Next time Voicemail
Asterisk PBX System Install - 09 Voicemail Macros
Asterisk PBX Install - Index
Subscribe to:
Posts (Atom)