Saturday, February 28, 2009

Uninstall Problems With AutoCAD Civil3D

Issue: After uninstalling AutoCAD Civil 3D 2008 we were unable to re-install because the installer thought that the application was already loaded.

Quick/Visual/Learning:
After using add/remove programs to uninstall AutoCAD Civil 3D we had a issue trying to re-install. The box for installing Civil 3d was grayed out. The text under the option said that it was already installed.

After searching for and deleting files from the hard drive and Autodesk registry entries the problem still persisted. In the end the fix turned out to be that we needed to rename or delete the installer directory for the application.


The directory for Civil 3D is the one in the picture above. Look for it in either:

C:\WINNT\Installer\{2CD6BBA0-17C8-4789-9B9B-B36F7E815F6A}

OR C:\Windows\Installer\{2CD6BBA0-17C8-4789-9B9B-B36F7E815F6A}

After renaming the diretory the installer no longer saw the application as already loaded and allowed to check the installation box.

Found this tool "Window installer Cleanup Utility" that is supose to do the cleanup for you.

Thursday, February 26, 2009

Outlook Forms Step By Step Index

As of 7/2009 Currently looking for a new job so I may not be as responsive as normal to comments.

  1. Determine Process
  2. Start Form
  3. Placing Text Fields
  4. Date Field
  5. Currency Field
  6. Frames / Radials / Checks
  7. Select Recipients
  8. Save / Test / Fix
  9. Read and Reply Forms
  10. Installing On Exchange
  11. Data Verification
  12. Access Forms From Webpage
  13. Completed Check Request
  14. Stand Alone Form
  15. Collecting Data
  16. Update Existing Forms

Monday, February 23, 2009

VMware Failed To Lock File Error

Issue: Running VMware windows guest on a Ubuntu host failed to start with error "Failed to lock the file".

Quick: In the VMguest folder delete the .WRITELOCK files.

Visual/Learning:
Error message looks like this:

"Cannot open the disk '/var/lib/vmware/Virtual Machines/Windows XP
Professional/Windows XP Professional.vmdk' or one of the snapshot
disks it depends on.
Reason: Failed to lock the file."

Go to the directory for the vm guest /vm/GuestDirectory
Delete all the writelock files.
rm *WRITELOCK
Now it starts up.

Friday, February 20, 2009

Install Windows98 On VMware For Old Games

Issue: You have an old game or program that only runs on Windows 98
Quick/Visual/Learning:

Found a list of howto steps here:

----Text From Link----
1. Install VMware.

2. Start it.

3. Select localhost if asked.

4. Click New Virtual Machine.

5. Next, Select Custom, Next.

6. Select MS Windows and 98 from the list. Next.

7. Select where to create it. Select hard disk which have most of free space.

8. Next, Next, One processor, Next, Enter desired memory. I left it to default (256). Next, Next, Next, Create a new virtual disk, IDE, enter disk size. Next and Done. It creates new virtual disk. Wait…

9. Now double-click the CD-ROM on the Devices list. Use physical device. Host. Select your CDROM drive from the list. Preferably first CD/DVD drive. OK.

10. Put your 98 CD in.

11. Click Edit virtual machine settings. Hardware tab, click Add… Next. Choose Floppy Drive. Next. Use physical floppy drive (If you do not have it, choose Create a blank floppy image.) Next and Done. OK. Now head to http://www.bootdisk.com/bootdisk.htm Select Windows 98 (SE if your 98 is Second Edition). Download it. If you do not have a floppy drive (I have it but it is disconnected), you’ll have to use WinRar to extract the exe. Install WinRar. Right-click the downloaded exe (boot98se.exe) and select Extract to PATH\ (boot98se). Ignore the error. Now open the folder which WinRar created (boot98se). Copy the .IMA file to folder where you created the virtual disk. For example: C:\Virtual Machines\Windows 98. Now back into VMware.

12. If you do not have floppy drive: On Devices list, double-click Floppy. Click Use floppy image. And Browse… Select All Files. Select the copied .IMA file. OK. Now it should boot from ‘floppy’.
IF you have floppy drive: use the exe to create boot diskette and use it to boot your virtual machine.

13. Now Start the virtual machine. Select ‘Start computer with CD-ROM support’ from the Startup menu. Let it to load drivers and stuff…

14. You’ll get ‘Windows 98 has detected that drive C does not ….’ message. Now type fdisk.

15. Answer Y(es). Select 1, Select 1, Answer Y(es). Press Esc, when done. You are back on A:\ prompt. Shutdown the virtual machine. And repower it. Again select CD-ROM support. And wait.

16. Now type format C: answer Y(es). Enter volume label, if you like. Now you have formatted C: drive.

17. Type CDROMDRIVE:\setup.exe, where CDROMDRIVE is most likely E: Press Enter, to let scandisk to.. scan disk. Now just follow onscreen instructions.

18. When it restarts, take out the floppy image , so it will not boot from it.
----End Of Text From Link----

This link may be helpful as well about get CD drive to show up on DOS machine

Friday, February 13, 2009

Self Assigned SSL Certificate For OWA

Issue:
You want to create and your own SSL certificate without going through a vendor for Outlook Web Access (OWA)

Quick: Use SelfSSL

Visual/Learning:

Download SelfSSL Tool
Put this on your server running IIS and install it per the steps below:


Run the file iis60rkt.exe
Click Next on the welcome screen
Select "I agree" on license page and Next
Enter information on Customer Information page and click Next
On Next window Setup Type select custom then Next
Click Next to take the default install path
On Select Features window you only need to select SelfSSL 1.0 click Next


To finish the install click Next on the overview window


To run the application you will need 3 things:


1.Website ID - Get this from IIS Manager


2.Common Name - this is the name that goes on the browser address line. Normally you would contact your internet service provider and ask them to add a DNS record for the name you want to use.


3.Valid Days - You pick a number of days for it to be valid.


You can find the website ID by looking in IIS Manager (see below). Here the identifier is the default of 1.


Start SelfSSL from the windows start menu.


You get a command prompt. 
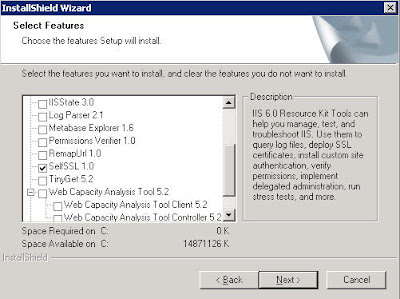
Type selfssl /t /v:365 /n:cn=Owa.MyCompany.com (or whatever you have registered in dns to get to your OWA server)


Here is a link with another method as well Free_SSL_OWA


Here is a link for using Third_Party_SSL_Certificate


Back To Index

Tuesday, February 10, 2009

Force Windows Safe Boot

Issue: Need to reboot a remote machine into safe mode with networking support. Or if just want to force your local machine without having to hit the F8 key.

Quick: Add to the boot.ini file - /safeboot:minimal /sos /bootlog /noguiboot

Visual/Learning:
Warning!!! This help shows you how to edit the boot.ini file. Be careful when working with this file. This file tells the computer where to go to boot windows and if you mess that up it wont start windows anymore till it is fixed. So be careful!

The example below shows XP. In XP and later you can run msconfig on the start run line to edit the boot.ini with a gui interface, but it works for windows 2000 as well you just have to edit the boot.ini file manually.


Go to the c:\ folder and open the boot.ini file in notepad.

Note: You may have to unhide system files for the boot.ini file to show up. You can show hidden files by opening a windows explorer window and select tools menu - folder options - view tab - uncheck "hide protected operating system files". You may also need to right click in the boot.ini file and uncheck the box for "read only"

Just take out the added boot.ini switches to boot normal again.

This link shows you all the switches
---Text from the link ------

The Safe-mode boot modes and corresponding switches include:

Mode: Safe Mode
Switch: /safeboot:minimal /sos /bootlog /noguiboot

Mode: Safe Mode with Networking
Switch: /safeboot:network /sos /bootlog /noguiboot

Mode: Safe Mode with Command Prompt
Switch: /safeboot:minimal(alternateshell) /sos /bootlog /noguiboot

Mode: Enable Boot Logging
Switch: /bootlog

Mode: Enable VGA Mode
Switch: /basevideo

Mode: Directory Services Restore Mode (Domain Controllers Only)
Switch: /safeboot:dsrepair /sos

Mode: Debugging Mode
Switch: /debug

NOTE: The /sos /bootlog /noguiboot switches are not required with any of the above settings, but they are useful to help with troubleshooting. These switches are included if you press F8 and choose one of the modes.

---End Text from link----

Thursday, February 5, 2009

VM Ware Bios

Issue: Need to change the boot setting for Virtual Machine running on Windows Host.

Quick: Select the virtual machine console window. Press alt-cntl-del esc-f2

Visual/Learning:
The boot may happen too quickly to hit the and get into the virtual machine bios settings. The following method has worked for me.

Start the virtual machine and select the console window. Press the Alt+Cntl+Del buttons at the same time.

This will cause the Guest machine to reboot but it also causes the Windows Host machine to switch to the Windows Security window.

Quickly press key to get out of the Security window followed by to get into the bios of the guest machine.

You can also add the following line to the small .vmx text file:
bios.bootDelay = "5000"